
This is getting exciting, I like the progress. Nice work son.


This is getting exciting, I like the progress. Nice work son.

Woohoo!Originally Posted by Paul B


Thanks Bruce & Steve,
It certainly has been a marathon undertaking restoring this machine. But a very enjoyable project.
Here is a short time line
The tear down, rust repairs, panel beat etc
Full body Acid dip strip, the body looked like a brand new after the dip strip
Protective steel coating applied, then zinc coated all inner sub frames, A pillars & C pillars
Epoxy urethane etch primer, (all steel body at this stage) 289 K HiPo motor being built to FIA H-M spec's
Fiberglass panels fitted and bespoke doors made as per FIA 1250 and MSNZ Homologated roll cage fitted
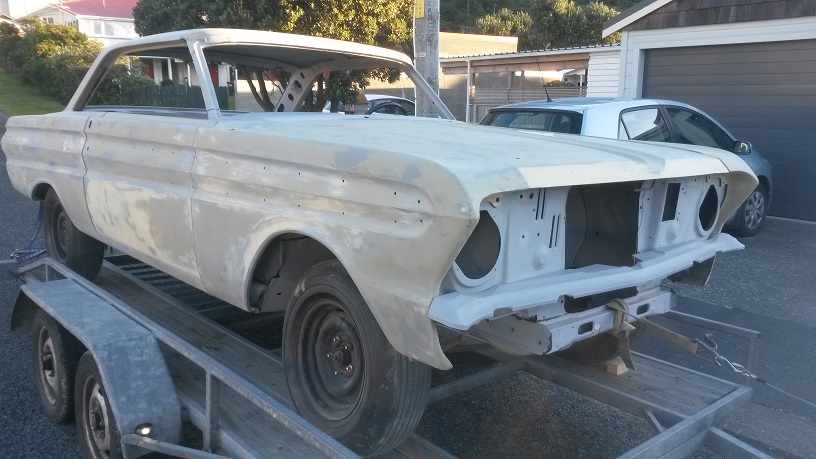
Body work done and 240 grit sanded for pre-paint primer
Last edited by Paul B; 08-23-2018 at 09:48 AM. Reason: update
In the spray booth 1 coat of epoxy urethane and 3 coats of primer (see post #320 for more shots)
Primed car ready for block down
It all looks so much easier posted up like this
Last edited by Paul B; 07-28-2018 at 11:13 PM.
Looking great Paul, just wondering if you are going to use the fan belt system as on the motor at present,these skinny belts seem to the most unreliable setup, could you use multi rib or toothed belt instead or would that take away the originality, keep up the great work, wished I lived closer so I could give you a hand with the sanding.
Hi Kevin,
The plan is that the car will be built exactly the same as 1964 as per the FIA homologation 1250. I do not want to run anything at all modern on the car. So yes I will use the old school V fan belt system, the 289 K Hi Po engines had a larger pulley wheel on the alternator to help at high RPM. I also will look into running twin V belts driving the water pump.
I am also planning to use a factory twin point distributor.
These systems ran very reliably back in the day, so correctly set up and installed should also work fine.
Thanks for the offer of the sanding too!
Cheers
Last edited by Paul B; 07-06-2018 at 09:22 AM.
A Japanese 1964 Falcon.
They built some speccy Falcons in 1965.
The 427 SOHC (cammer) "B" Falcons were certainly very fast machines back in 64 & 65.
I believe they ran sub 10 seconds on the 1/4 mile.
The cammer engines are nothing less than a work of art and back in the day ran 600hp straight out of the crate from Ford or Holman Moody.
The drag racers got a hold of them and supercharged them to 1200hp.
Great stuff!!!
Paul...you have to stop dreaming and get back to sanding you still have the 400, 500 and 600 to get through. You dont want to wear your fingers out on here.
Yes boss
back to sanding it is
Update... Still sanding and sanding. The shell is almost done and will be painted very soon, That is the bulk of the work. The bolt on Fiberglass panels will be much quicker to do.
I dropped the Kelsey Hays 15 inch steel rims (which was what was actually used on the Monte Carlo Falcons) and 3 spare 15 inch rims into the sand blaster and had them blasted, zinc coated and painted black.
Before:
After:
I will likely run some 15" Dunlop CR65 or Avon CR6ZZ on these rims to keep it real.
Not planning to use these steel rims on the track as I also have a set of 15" American Racing Torque Thrusts for the track which I will likely use Hoosier tyres with.
Last edited by Paul B; 08-13-2018 at 08:44 AM.
I have been working on the under floor this week, I have sprayed 1 coat of epoxy urethane and 1 coat of primer, it is getting a light 400 sand (and sand out a couple of runs) and then I will spray the finishing coats of red oxide
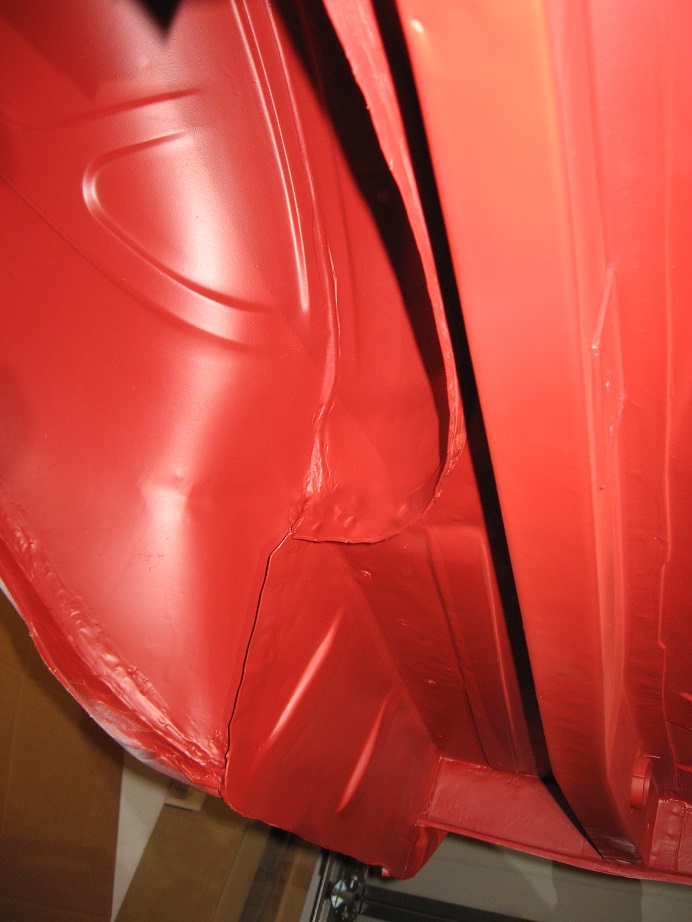
Right rear wheel arch
You can see the black seam sealer that was applied earlier seems to disappear when its painted.
The original 1960s seam sealer hardens after 50 years and cracks. This was all removed when the car was dip stripped
The modern seam sealer is very strong and durable stuff, it also has a level of flexibility and does not split or crack. When applied to a correctly to a prepared surface, it not only seals all the spot weld construction points/seams but it also adds a very strong bracing factor which supports the spot welds and seams.
Best of all it looks just like the original stuff just better.
Last edited by Paul B; 08-23-2018 at 09:55 AM.
I restored the front headlight buckets and installed new Right hand drive Ford branded sealed beam units
Before
After
Its all available new reproduction, but you cant beat the original parts when they are restored
Last edited by Paul B; 08-17-2018 at 08:20 AM.
Looking good Paul, but surely the factory cars had runs in the paint, should you have authentic Ford like runs in your paint ?
Just sayin'
There will be a few runs in the underfloor paint, as they were in the day. Its actually quite tricky to spray the underfloor with all of the odd shapes, guess thats why there were runs in the paint on the original cars when built. But its lookin good so far.
I will post up some finished photos when done.
Last edited by Paul B; 08-17-2018 at 10:11 PM.
The first finished surface is the one you see the least, the under floor & chassis.
I have sprayed it with the Red Oxide finishing coats (4), the same as it was built in 1964.
The pictures have been taken with a flash and parts of the pic's look so much lighter red than it actually is. The actual colour is a very dark red
Under right door (this picture is the actual colour)
Rear fuel tank area ( I repaired the top corner of the fuel tank area, top left side as you see it )
View from diff facing forward (I replaced part of the left rear floor)
Right rear wheel arch (I also replaced the lower rear fender, it had to all be replaced 50mm up, inside and outside, had to make new panels by hand as nothing new was available)
Last edited by Paul B; 08-27-2018 at 09:09 AM. Reason: replaced images with better ones
Beautiful work Paul! Its really looking good.
Bloody marvelous
Thanks Steve & Rhys,
The pictures are not very good, It looks like fire engine red!
It is actually a very dark red and looks much better in natural light.
Cheers
 Posting Permissions

 Reply With Quote