
and a signed copy https://biblio.com.au/book/high-spee...0/d/1409609751


and a signed copy https://biblio.com.au/book/high-spee...0/d/1409609751

My Great Nephew has this one ...Originally Posted by hotrod1

Hi Roger they are very simple and a bit tatty but too good to replace, It dawned on me when I looked at the photos I posted how much it looks like an unmade Airfix model kit, its got me worried as I could never do one well I would just end up with bits missing and my fingers stuck together.
Thanks for that Bry but book purchase's are on the back burner all my spare cash is going into parts for the car as I am a man of limited means and expensive tastes.
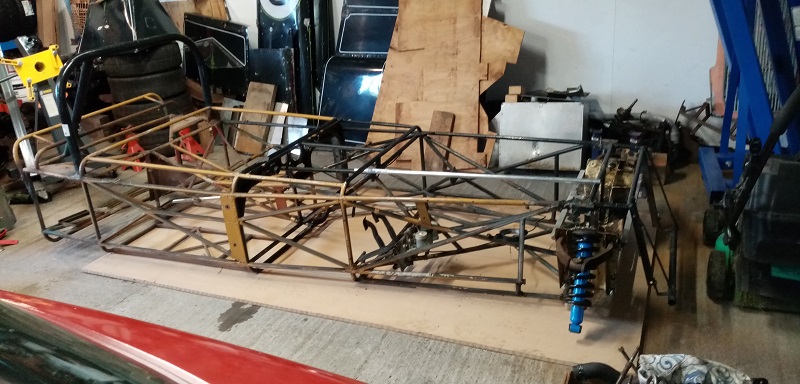
With the frame naked I have had a chance to run a tape over it to check for squareness and it is mostly good except the front right hand corner was kicked up a little but before I dropped it down onto the floor I thought I would straighten a bent cross tube second from the front at the top, it looks like because there are no real jacking points under the car someone has used a lifter hooked to the middle of the tube to lift the car for some reason. A few taps with a jewelers tool [12 pound ] and it was straight again and that also fixed the kick up at the front corner easy as that. I will be adding some tubes into the front to help hang the new suspension parts so that should add some much needed strength into that area.
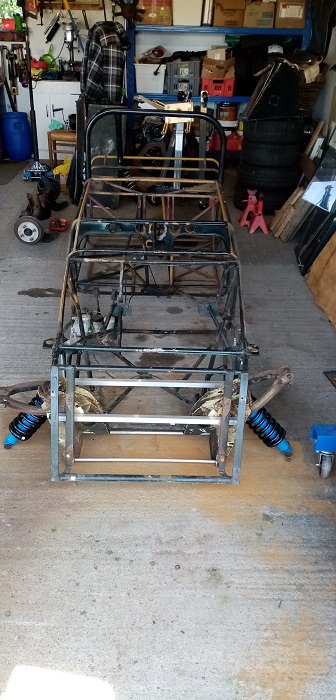
I've never seen a Clubman-style frame with so many tubes and so little triangulation...
Well, maybe I've seen worse on the triangulation front.
I tend to agree. The frame looks like it wasn't drawn, it just happened. Two diagonals in a bay where one thoughtfully placed would do.
Not denigrating the effort for a minute. It's very typical of it's period.
One question - what's the welding ? TIG or gas ?

How long has TIG been around?
I love taking things apart. Zero engineering expertise putting things back with modifications.
Hi Ray I Know what you mean but surprisingly strong from the firewall back, I have had no experience with tube frames mainly hot rod ladder frame stuff so I am doing some research, I am lucky that I have an extensive library of older motor racing history and racing and sports car chassis design and development books from the 50s and 60s so I am slowly getting my head around the issues I am facing and have started to plan some small improvements. But I am always open to suggestions I know a lot of people on this site have many years of experience doing this stuff so any constructive comments are welcome.
Hi GregT yes there are a few too many tubes in places buy still surprisingly light I can lift it up at either end with one hand with little effort and it has lasted this long without any major twisting or sagging so it can't be all bad. the welding looks to be mainly gas but with some TIG as well for the repairs. I am not a confident welder so I will do all the donkey work and then a friend who is a tradesman welder will do the hot stuff.
Hi ERC that sums me up too but you get points for giving it a go and I am learning all the time, I am running out of sticking plasters and hand wash. HAHA
Well, that does help to date it a little. TIG was available in ChCh from the 50's - there were a couple of specialist welders with the gear. If it had been MIG welded IMO that would have dated it as reasonably late work.
Gas of course has been around for years - but fusion welded gas is actually quite rare I'm told, most fabricators preferring bronze welding or refining it by using nickel bronze.
My personal preference based on 30 plus years of building roadrace motorcycle frames is bronze welding as I find distortion to be much less.
Carry on.
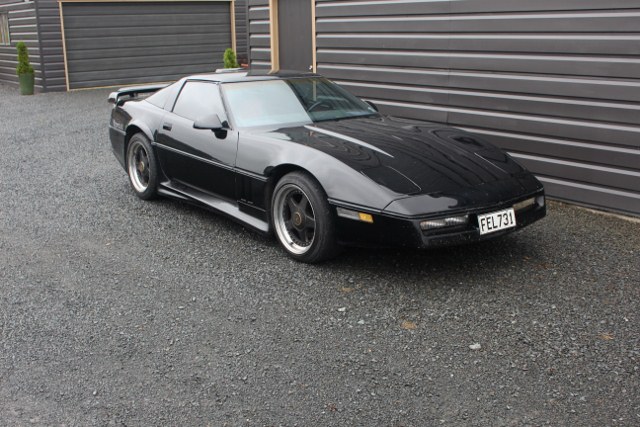
Today I turned the frame upside down to deal with the last of the rivets drilling them out or punching them thru this has left a lot of holes that will be plugged with weld and dressed later before painting.
The biggest surprise of the day is that the tubes that make up the floor of the frame have only been welded from the top with all the bottoms of the joints left unwelded, I guess they just forgot to flip it over to finish them when the frame was first built, none of the joints have fatigued or broken over the years and there is very little flex, the photos show the gaps, it will all be welded up when the rest of the frame is done. I think I might be making it sound like the frame is poorly built but I think for a home built of that era it is suprisingly strong and has lasted well. everything from the firewall back will stay the same except for adding a few tubes to support the new belly pan under the drivers feet.
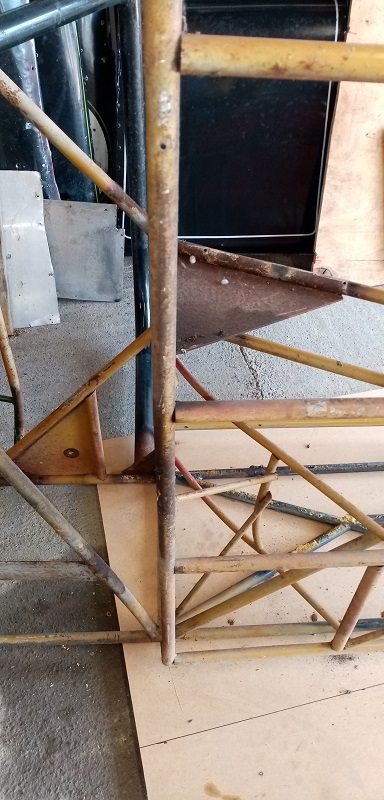
Not having a chassis jig to measure and square up the frame the best I can do is get it on a flat surface and have at it with string lines, rulers and tape measure, I found the flattest part of my garage floor and laid down a thick sheet of MDF marked with a center line. I have lined up and fixed the rear bulkhead of the frame to the back edge of the sheet with the middle of the crossmember on the center line the frame sits flat on the MDF sheet all the bottom cross members are parallel and the side frame rails at the firewall are only 5mm off center so that is good enough for me, But the rails forward of the firewall are cranked over to the right quite a bit as just over 1 meter forward of the firewall the side rails are 30mm off center, This does not seem to be as a result of accident damage as the front top crossmember is still parallel to the firewall and the floor, it looks more like the original builder got the measurements a little wrong.
This explains why the front suspension had a lot of shims on one side and the centers of the front and rear hubs on each side of the car were 15mm different.
This will all be addressed when I redo the way the tubes run at the front to add in some more triangulation,strength and fit the new suspension components.
hi,
just remember the old henry ford expression "simplicate and add lightness". best way of making any car faster.
Good advice 928 I think the car will be a little lighter when I am finished even though I am having to add some tubes around the front end as some of the bits I have cut out that I thought was tube was solid bar and the steering rack mounts were flat steel bar the new rack will mount to the suspension towers to save using brackets.
I bought a pair of cheap of bathroom scales fron the big red shed so i could keep track of weight.
I'm doing the same
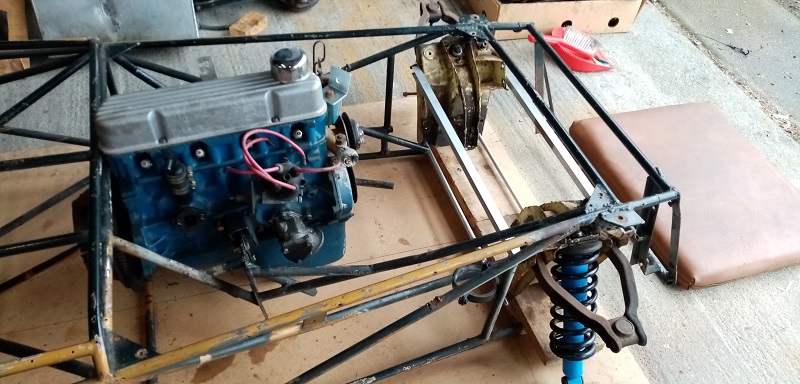
so now I have the frame mounted to a sheet of MDF I can start to get some of the poorly placed tubes forward of the firewall removed and to make sure I don't place any of the new tubes in the wrong position I have placed the engine back in with new engine mounts the aim is to get the bottom of the sump as low as I can but without it being any lower than the bottom of the frame.
A lot of the tubes around the bottom of the engine have been removed as they did not add much strength and the frame in front of the suspension that hung the radiator and nose cone has also been removed. they will be replaced with a more simple but stronger arrangement that should be a little lighter and tidier.
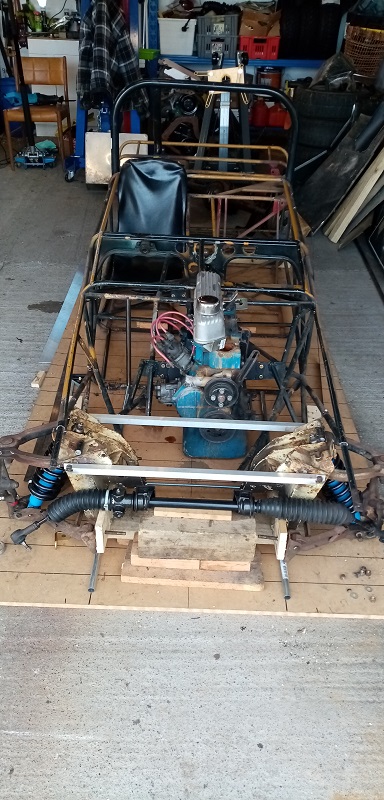
I have marked the MDF sheet with a center line and added lines across the sheet spaced at 100mm and by using these as a guide and measuring from the edges of the sheet I can make sure the frame is square using rulers and a large square, It may be a little crude but is effective enough for the job in hand, I am lucky that the bottom of the frame is flat so I don't have to deal with uneven heights while taking measurements.
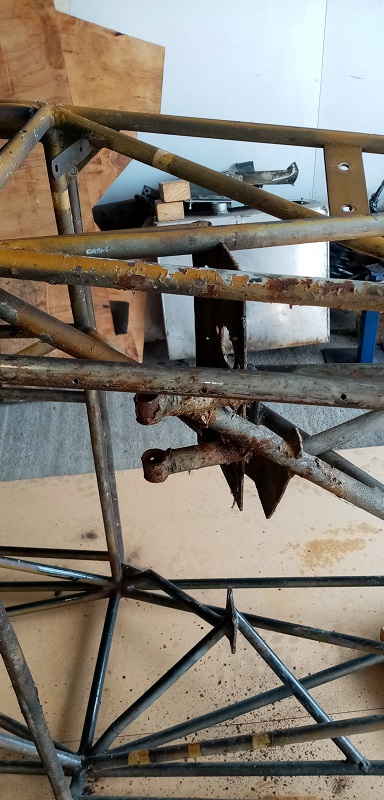
To keep the frame steady I have screwed blocks of wood onto the MDF hard against the tubes this holds it in place quite well and they can be adjusted if need be latter, one of the bottom crossmember's has some rust inside the tube so that will need to be replaced before I can start adding in the new tubes.
 Posting Permissions

 Reply With Quote