But having said that Oldfart the angle and length of the steering arms comes into play thus the lock to lock or steering angles may not be that much different.


But having said that Oldfart the angle and length of the steering arms comes into play thus the lock to lock or steering angles may not be that much different.
If anyone's tried to avoid bump steer, those things won't be affected...
I'm only quoting an acknowledged expert who states that the only measure of a quick rack vs a slow is the travel that the bar makes per turn assuming the same steering arms at the hub.Originally Posted by Allan

Hers a few pics of the car on the track that may have been taken in the 90s and a paddock shot would anyone know the other cars in the background as if I can find out when and where the shot was taken I may be able to get some info on the car from the race programs or other competitors.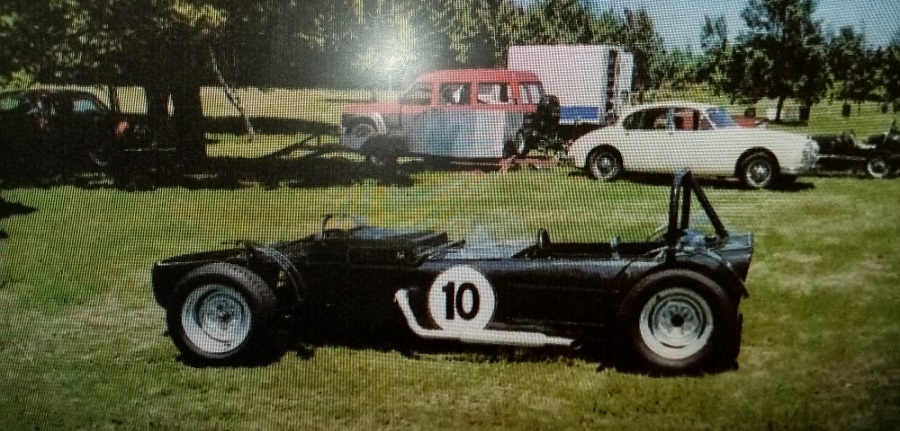
That looks very like the Taupo Club circuit "paddock". Many of the low key events never had programmes. perhaps the Historic Racing and Sports Car Club meets , usually December??
I'm starting to sort the mods to the front suspension it looks like I will be needing to redo more than I had planed, on inspection the inner top and bottom bushings are badly worn and because they are trunnion type bushings rebuilding them will not be an option due to parts availability. so I will be swapping out the A arms with Spitfire/Herald ones so I can use the later type bolt though bushings and bottom trunnions this will mean changing the mountings at the chassis. the trunnions that are in the car are a different design in that they have studs as part of the bronze bushings and they must have been installed in the bottom A arm before the arms had been reinforced by welding in box section not the best engineering solution.
The brake calipers that I purchased as rebuilt type 12s turned out to be later/larger type 14 or 16s I only worked this out when the Herald/Spitfire uprights and disk brakes that I will be using arrived. they have the smaller type 12 installed so I now know the difference I will put the larger ones away in case I need them in the future. the type 12s that came with the uprights will need to be rebuilt but the parts are available and are on order, the uprights came with the calipers and early style mounting brackets, hubs,disks dust shields, Trunnions and steering arms. the disks are old and will be replaced with new ones and I have a full bearing kit to install on the stubs, the trunnions are in good order and will be used but rebuilt with new bushings and dust seals. the disk brakes will be better for racing than the small drum brakes but will still look the part and suit the target build era being that they where used up until 1967. the steering arms installed in the car are longer than the ones that come with the disk setup and will be reused.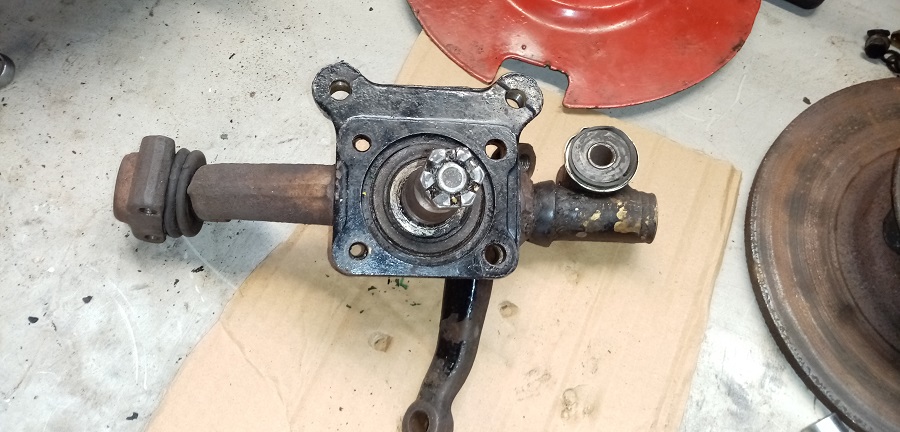
the steering arms fitted to the car are longer than the Herald ones that came with the uprights it is tempting to use the shorter arms to give a faster steering ratio but this would mean I would have to reposition the steering rack forwards and as is the steering seems both light and fast I will keep the longer arms until I have used the car on a track, the arms bolt to the uprights the same way so that may be an option for later.
the photo below shows the size difference between the type 12 calipers I will use and the larger ones, both being cast iron the smaller ones are quite a bit lighter so will be less unsprung weight, this may help on the track as the disk brake setup is heaver than the drums that I am replacing.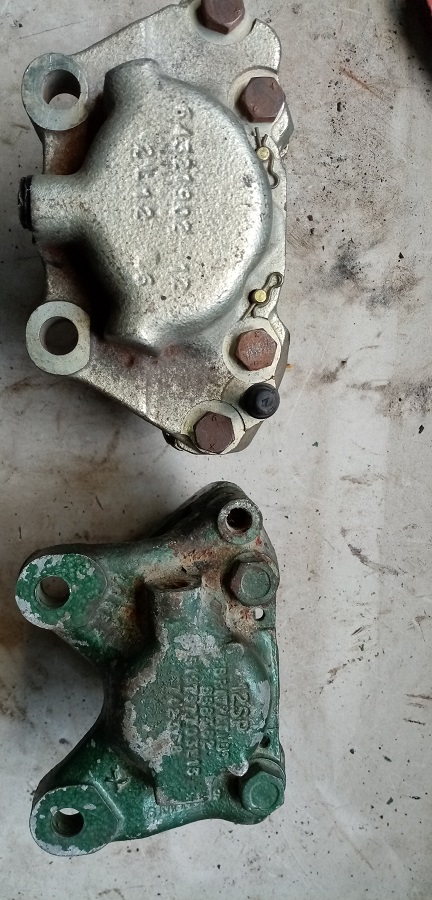
The front suspension is going to be the most complicated part of the rebuild but replacing some of the parts with Herald/Spitfire parts is the best way to go as I will be able to correct some of the geometry and engineering along the way, I have some Herald A arms and mounting brackets coming so I should be able to sort out how it will all go together before I have the car stripped down to the tubes,
I have disassembled one side of the suspension so I can compare the new setup with the old, I have removed one front guard and its mounting tubes they had been poorly welded to the chassis tubes one mount needed a little filing of the weld to remove the other fell off when I leaned on it, new mounts will be made that will bolt to gussets that will be welded into the tubes as part of the strengthening that will be needed when truing up the chassis.
Drilling out some rivets allowed me to remove one side cover exposing the pedal assembly and master cylinders, all the body panels will be removed eventually so that the tubes can be inspected and gussets and/or extra tubes added to take the loading off some of the welds then it can all be painted before the body panels are refitted.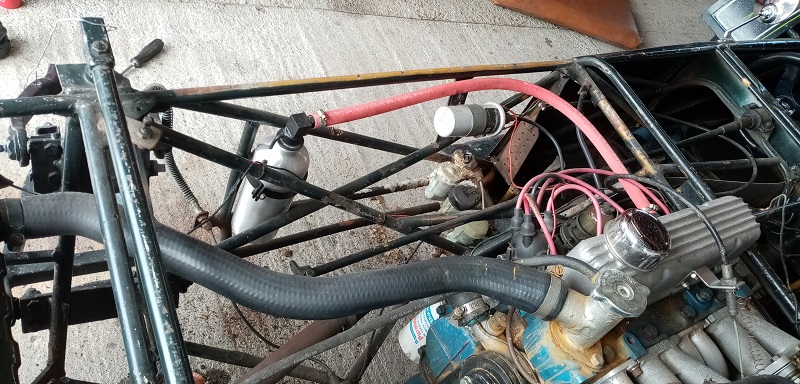
here are some workshop/parts manual drawings showing the differences between the Standard 10/8 and Herald/Spitfire front ends. the A arms in the car have been modified to be closer to the later units in that the bottom shock/spring mounts fit like Herald ones but the angles are wrong so the through bolts are skewed in the bushings causing uneven wear to the bushings and binding during suspension travel, sorting this and changing the top spring/shock mounting should help with the handling I have some uprated Spitfire springs coming that will also help being shorter but stiffer than the ones fitted.
sometimes the small jobs take a lot longer than you think, the type 12 calipers that came with the uprights need to be rebuilt the parts are on order so the first thing that needs to be done is to strip them down ready for when the kits arrive. an extra pair of calipers came with the parts so best to strip both pairs use the best pair and rebuild the other pair for spares. both pairs had been sitting unused for a long time by the looks of them, the green set had no rubber dust seals and had paint on the exposed parts of the pistons the pistons had seized in the bores the unpainted ones had perished rubbers some surface rust and had also seized in the bores so some how I had to remove the pistons without damage to the bores or the lip that captures the outer dust seals. I plumbed them up to the car using the hose that had been fitted to the front drum brake but to no avail as none of the pistons would move even pumping the pedal like a madman likewise no movement with compressed air. so time for brute force. I am replacing the pistons so damage to them is not a problem the internal fluid lines in the calipers will need cleaned out so I needed to split the calipers apart anyway and this helped getting at the pistons, the exposed edge of the pistons has a lip that holds the outer edge of the dust seal but this was too fragile to use to drive the pistons out with a drift but all the pistons had about 4mm of piston exposed so I was able to drill some small holes into the sides that I could catch a center punch on and by taping one side and then the other I was able to walk the pistons out of the bores, this sounds easy but I taped away like a cobbler for about 3 hours to remove the eight pistons. but in the end the bores show no damage and will be able to be rebuilt after a good clean and paint. in the end I could have purchased new calipers but wheres the fun in that.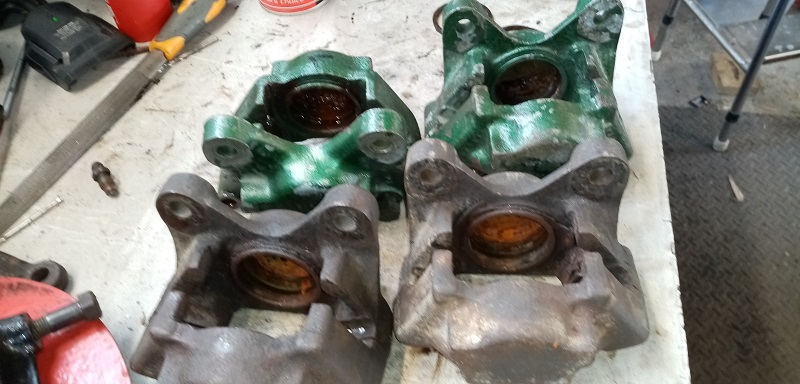
What's the PCD of the front hubs that were fitted to the car?
Hi Allan 4X3.75 standard Herald/Spitfire/Lotus I am looking for some widened or standard early Spitfire rims if any one has a few I have a set and they will look right on the car but some wider ones would give me some better options tyre wise.
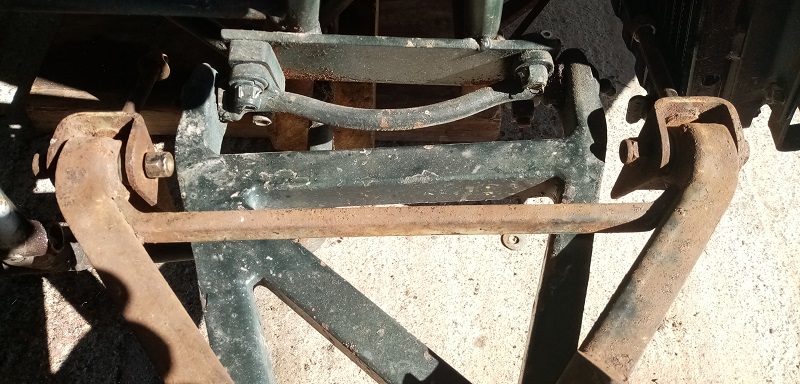
I have the Triumph Herald A arms so now comes the fun part making them fit, the top arms are the same dimensions as the Standard 10 ones but have the better bolt through bushings and they mount differently the bottom ones are quite different they are shorter and much wider where they mount to the chassis/frame but they come with mounting brackets that can be shimmed to adjust the suspension. I have no tubes in the frame close enough to mount the bottom ones to but there is plenty of room to add some form of support once I work out where everything will to need to be, the top arms are very close to the mounts in the car but I also need to fit new top mounts for the shocks/springs the best way to do this will be to fit Herald turrets that normally bolt to the chassis and carry the upper parts of the suspension this will mount both the top A arms and the standard Herald/Spitfire top shock/spring mount bracket. I have found a pair of turrets so I will pick them up next week and see what I need to do to fit them to the frame tubes then I will fit some mounts for the bottom arms, I will be able to use measurements from a Herald to get the turrets in the right place. here are some photos of the A arms.
.
Removal of the rear body panel has allowed me to get a good look at the rear suspension it is all in good order but will need a clean down and paint, the bushings will need replaced and the springs and shocks will need some attention. one thing I have found is that the rod ends on the trailing arms have been adjusted out too far and this has allowed the rear of the diff housing to come into contact with the front of the alloy fuel tank causing it to dent and start wearing away at the tank, if the car had raced like this for much longer it would have holed the tank so not running the car before the rebuild was the right call.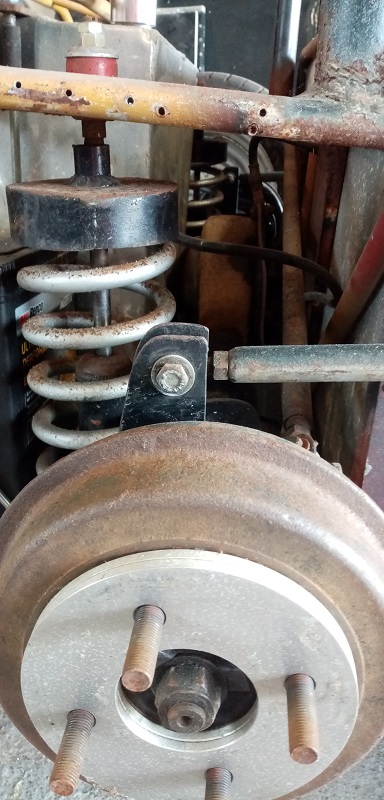
On trademe try jcmdirectltd also called wheels christchurh for your wheels if you haven't already.
I now have a pair of turrets for hanging the front suspension this should make for a much stronger base and will also allow me to fix the bad geometry in the original setup, to make things easier I will be copying the Herald/Spitfire track measurement and this will allow me to use a standard Herald steering rack this should help with the bump steer issues that the shortened Cortina rack was causing. mounting the turrets will not be a simple task as they will need to be tied together across the car using tube or box section and new mounts will need to be created for the steering rack but it will be good to do away with the poorly constructed rack mounts that the car has.
The shorter but stronger upgraded springs have arrived and I have fitted them to the shocks using a standard Herald top mount that fits into the top of the turrets this will correct the wild spring travel angles with the movement of the suspension and still allow for some height adjustment by the use of spacers.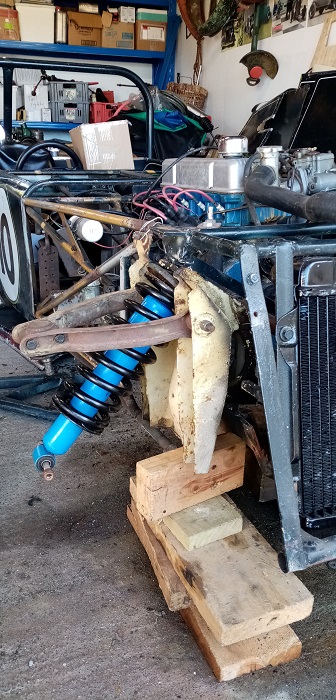
along job ahead. a small suggestion. it might be easier to take the whole car apart and work from the inside out. then you will not have to remove some bits over and over.
just my 2c
928
Agreed...
And I think you will find that the standard Herald track will be narrower than you want. I wouldn't be altogether sure that the Herald didn't have bump steer either.
 Posting Permissions

 Reply With Quote