the new Triumph Herald steering rack will mount to a flat bracket that will hang between and brace the suspension turrets using the Herald rubber bushings and U bolts this will mean I will not have to add separate mounts and save weight.


the new Triumph Herald steering rack will mount to a flat bracket that will hang between and brace the suspension turrets using the Herald rubber bushings and U bolts this will mean I will not have to add separate mounts and save weight.
Just a light day in the shed today finished my last 12 hour night shift for the week at 6 this morning a few hours sleep and in the shed at lunch time, the plan is to refurbish some of the small front end parts the calipers will have to wait as after waiting 3 weeks for the new caliper pistons the wrong parts arrived the part number on the box was correct but the pistons are the later type 14 ones, so I am up for another long wait until the correct ones get here.
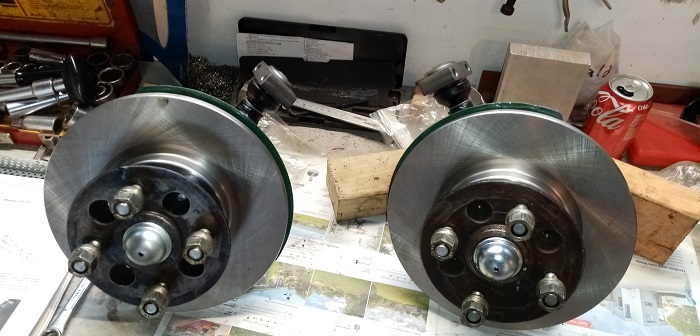
One of the many small upgrades for safety is to replace the 3/8 wheel studs with Land Rover Freelander M12x1.5 studs, I had a few Heralds in my teen years and can remember tightening the wheel studs and braking 2 off the small studs are barely strong enough for a light car like a Herald so it is common to do this mod when upgrading suspension or hotting up a Herald or Spitfire for track work, the freelander studs have the same shank size as the stock ones but are thicker and longer so they are much better suited when fitting wider wheels or mags.
The photos show the size difference between the two and pushing out the old studs and pressing in the new is a simple task with my 12 ton press, The fatter studs still fit the standard wheels and shown is the hub fitted to a Spitfire wheel center.
Another job on the list for today is to fit the new bearing races into the front hubs so after a good cleaning I used the old bearing races as drivers to press in the new ones then these and the cleaned up stubs received a first coat of paint they will get another coat tomorrow and the I will leave them for a few days for the paint to harden.
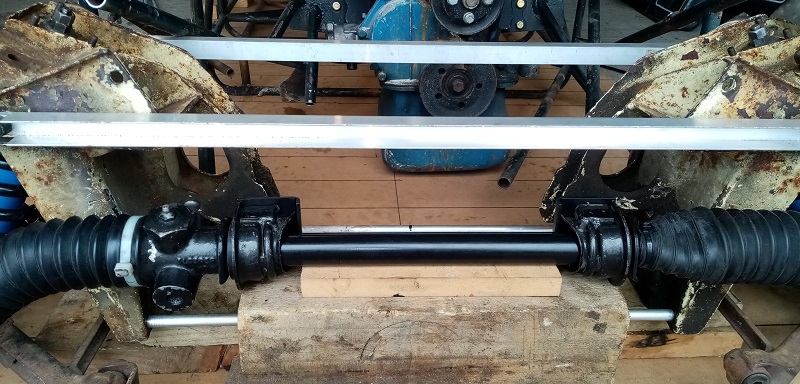
I will be using White Knight Rust Guard epoxy enamel on most of the car as I have had good results with it in the past, it takes a few days to harden but is very long lasting and if applied in 2 thin coats with a brush it looks as good as a spray job. Basic gloss black is the mainstay for the suspension and mechanical bits but the chassis frame and some parts will be done in Cottage Green this is a very 60s color and will add a nice contrast to the panels, I have purchased brush paint and spray cans of both colors and will decide what gets what as I go.
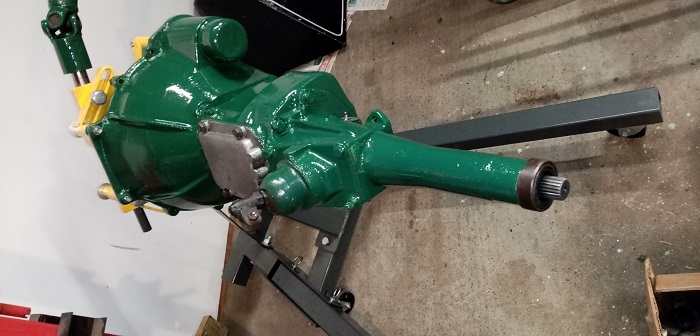
Another light day in the shed today I put the diff up on some axle stands it is from a Standard 10 made some time in the 1950s the same diff was used in the early Lotus 7s, the first series 1 lotus 7s used a BMC live axle from the Nash Metropolitan until they sourced a supply from Standard Triumph for the series 2 they cost less at the time and were lighter and came with a choice of ratios [4.1:1 and 4.55:1] the down side was that they had smaller 7 inch brakes but by using the Triumph 7 inch front brakes the wheel stud pattern was the same both front and back for the first time.
I removed the brake drums and the brake shoes are near new and the adjusters are not seized and the square screw heads are not rounded off so it looks like they have done little work since a rebuild, the rubber cups on the slave cylinders are aged so to match the new front disk brakes they will be replaced with 11/16 cylinders as used on the later Spitfires, Vitesse and GT6s the drums are quite worn so I will replace them with a pair of new ones as the cost is not much more than having them milled. the arms for the hand brakes are still there but a hand brake lever is not fitted on the car, I am not sure if I will fit one although the weight of adding one would be minimal and it would be handy when working on and loading the car on the trailer I am open to suggestions on this.
The diff seems free and there is not much lash on the pinion so a coat of paint and we are good to go.
The gearbox also got a clean down and a repaint today and the cottage green color I am using for the frame and a few other parts such as the engine and driveshaft is very 60s so the car should not look too modern.
I have decided how the front suspension will be mounted and where the new frame tubes will run but I am waiting on the steel to arrive so it is a good time to get a few of the smaller jobs [of which there are many] done and make some decisions on what other mods will be needed to make the car safer to drive,
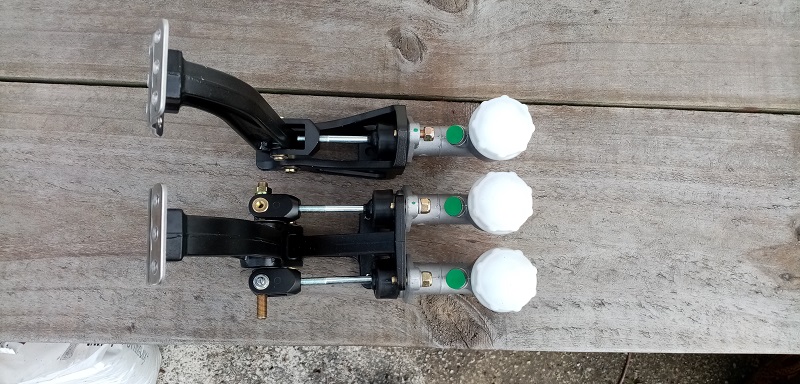
The brake, clutch and throttle pedals had been cobbled together and poorly engineered the pedal pivot was a bolt without any way to add grease and the pedals had been cut and welded, the mounts to the frame had broken away at the joint so I have removed the lot and ordered a set of after market Wilwood pedals with a brake balance bar and a full set of new Girling master cylinders. this is more than I was planing to do but will be a lot safer in the long run.
Here is something I need a little input on from any racers or builders out there the car never had a sway bar fitted but the herald suspension A arms I am fitting have mounts for a sway bar so the question is will one be needed and should I fit one, there will be limited suspension movement so I am not too worried about body roll but if I need one now is the time to fit it. feel free to let me know your thoughts on this.
hi,
if you have a dedicated race car no need for a handbrake .if it is not there it cannot give problems and less weight.
roll bars (sway bars) I would put mounts on the chassis but leave fitting one untill you drive the car and establish if it needs one.
just my 2c
The need for a handbrake depends on what sort of events you're going to do. They can be very useful at a hillclimb start for example.
Yeah, wait till you drive it before fitting a roll bar.
the ability to heel and toe solves the hill climb start problem with no extra bits.
Thanks for that guys yes I think I will fit mounts for the sway bar in case I decide I want one later, I do have one to use for the setup so it should be easy to fit.
Back to the shed still waiting for steel tube so its a good chance to get some of the small jobs done on today's list is assembling the brakes and hubs onto the stubs and uprights, I had already fitted the new bearing races into the hubs before painting so I lubed the Trunnion's and fitted the caliper mounting brackets, dust shields and steering arms to the uprights then bolted them together, then the grease seals were fitted to the base of the stubs, next the new brake rotors got bolted to the hubs and I packed the new bearings with grease, then I could fit the hubs on to the stubs, tightened up the castle nut and fitted the split pins. the caliper pistons have not arrived yet so I will have to rebuild and fit them later, the new upper ball joints are loosely fitted to the stubs to keep every thing together but I will not fit the trunnion rebuild kit until I can fit them to the A arms as they are easily damaged. so now they will all go on a shelf until needed.

Freelander studs in a Triumph Spitfire/Herald/Vitesse suspended car also allow the fitting of I think, MGF wheels. Obviously not valid for an historic car!
I stripped the splines on one of mine just before a race meeting at Hampton Downs. Thankfully, Andy Culpin's son at RaceFX managed to do a quick fix with a dob of weld.
Some times small jobs can consume more time than you would think, today I thought I would get the front suspension A arms and turrets and rear 4 bars cleaned up and ready for paint. the A arms had lost whatever paint that they had from the factory and had a good coating of surface rust so out with the wire brush and sand paper and an hour later they were fit to paint, the front suspension turrets and 4 bars had a good coating of paint, the 4 bars sanded up without too much trouble but the turrets seemed to take forever to get back to bare metal too many angles and 50 year old paint I guess. a good coat of black gloss paint and they all look as good as new so they can hang up on wire hooks until the paint hardens then they can be put on a shelf until the time comes to reassemble the car.
The global shipping situation at the moment means that some of the parts I have on order are going to be a while coming so I will need to do the jobs I can and not worry to much about my expected time line. All good things come to those that wait or so the saying go's.
The new brake and clutch pedals and master cylinders have arrived these are one of the few truly modern changes I will be doing but the old setup was poorly made and not well mounted, the Wilwood components will be a lot safer and the brakes have a balance bar to adjust the bias between the front and rear brakes if needed.
Hi Rascal I have no idea who built the car I purchased it from the North Island but it could have been built anywhere. none of the old time racers here in Waimate recognized the car and the name Alister Rayner has not been mentioned.
Fare comment on the brakes
The original pedal setup was not usable as it was poorly engineered and had broken loose from the frame due to the poor welding and rust, the peddles had been cut and welded at odd angles and would have been unsafe to use. I will check to see if the new setup meets the criteria and if not I will build something suitable but it will be along the same lines of this new stuff as safety come first.
If in the end I cannot meet the criteria for historic racing then track days and sprints ect will be fine by me.
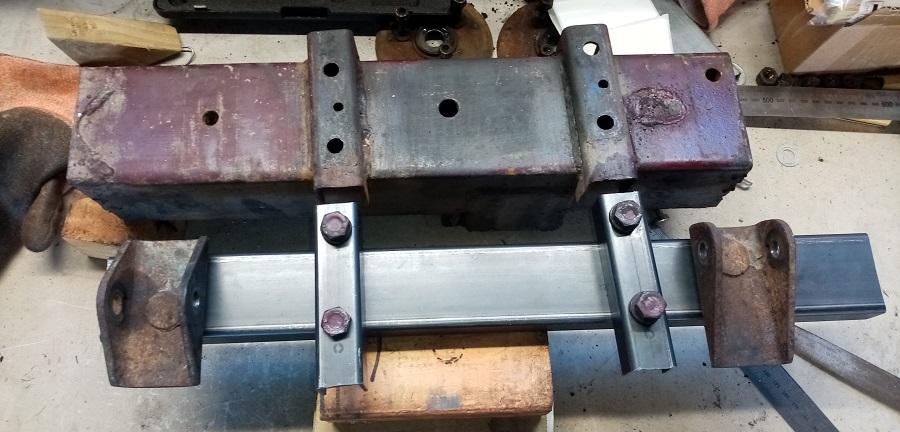
Fitting the front suspension towers is a work in progress, the towers bolt to the chassis rails at the bottom in the Heralds and Spitfires and I have been able to get a set of partial front chassis rails to use to get the correct measurements to build some brackets to mount to the tube frame and to fit to the bottom tower mountings. I don't want to add any more weight than needed and it all needs to be strong and stable. the original setup was poorly engineered and the A arms were moving in all sorts of ways none of them correct so the new stuff should be a big improvement even though the parts date from 1959. I need to have the tube frame mostly sorted in the next few weeks so I can get it all welded up then I can paint it all and start putting it all back together.
If it really isn't allowed to use the brake components, the casting in the Wilwood is almost a direct copy of the Ford 100E one used by many constructors in period. I have one in my Morgan, most Terrapin used them as did Brabham amongst others.
Hi Oldfart I had a look at the 100E one and that could be a good option if I am unable to use the Wilwood ones. thanks for your input. I learn a little every day and I still don't know what I don't know.
After a few weeks of tooling round in the Corvette and catching up with the family and having very little time to spend in the shed I have had a few days to get stuck back into the car, I have sorted out how the new bottom brackets will mount to the tube frame and now I will just have to work out how to mount the top of the turrets to the top tubes of the frame. so time for a trial fit using pipe clamps and welding magnets to keep every thing together, I cannot fit some of the new tubes until the tube bender I have ordered arrives from offshore, I had planed to have everything ready for welding by now but shipping delays and Covid related hold ups have slowed things down a bit but I should be able to have the car back together for summer. there are plenty of small jobs to do so I have plenty of things to keep me busy over the winter.
The new suspension looks a bit tidier than the old parts even though the new A arms, turrets, uprights and stubs date from 1959 and the type 12 disk brakes are from 1962 but more importantly it should all work together and give a better ride, more control and better braking than the poorly matched setup it has replaced.
The shiny alloy channels in the photos are only there to keep everything straight and true and will be removed when it is all welded together.

Last edited by hotrod1; 05-03-2022 at 06:57 AM.
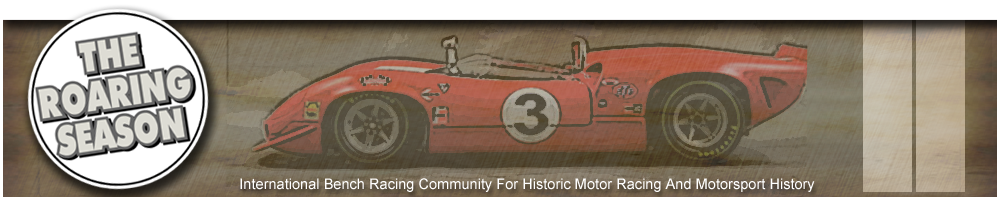
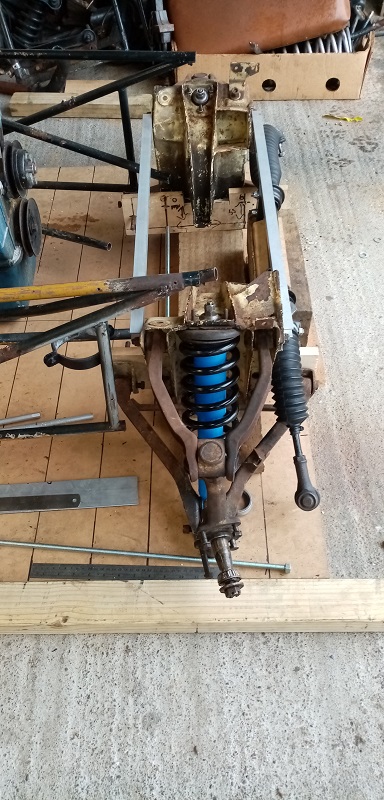
The work has slowed down a bit with the rebuild but I am still getting some jobs done. between being flat out at work causing me to rest up longer after my 12 hour shifts and the cold temps in my unheated garage my stints working on the car seam to be getting shorter and shorter. but today I made a temporary mount for the steering rack from some scrap alloy, it mounts to the front of the suspension towers and doubles up as a brace between the towers, I am using stock Herald rack mounts/clamps and once I have the rack height correct in relation to the A arms and the steering shaft universal lined up to pass through the hole in the tower I will remake it in steel.
 Posting Permissions

 Reply With Quote