yes 928 that is the plan in the process of removing the running gear now should be down to a bare frame in a week, I have to fit it in around work 12 hour shifts mean limited garage time during the week. Cheers
yes 928 that is the plan in the process of removing the running gear now should be down to a bare frame in a week, I have to fit it in around work 12 hour shifts mean limited garage time during the week. Cheers
the Herald track is only 1/2 inch different so should be good Cheers
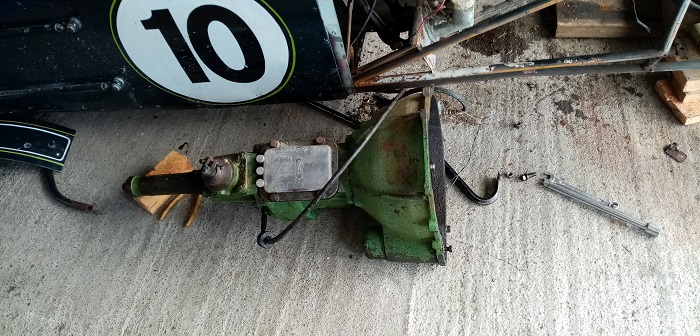
Today I removed the engine and gearbox I thought this would be an easy job but because of the limited room around the rear of the engine and gearbox a lot of stuff had to be removed before I could get at the mounts and bolts , the headers had to be removed along with the Weber carbs these where bolted on to the head with cap screws but some of them had limited space to get a key into the hex so I had to cut a key down to fit and removing the generator let me get a hand up behind the headers [only just] I could only get a few degrees of movement at a time so this was a long process.
The engine had to be parted from the gearbox to come out of the hole due to the frame tubes being in the way and then I lifted the gearbox out by hand, the gearbox mount was broken and the engine mounts had sagged with age [havent we all] so the engine will sit a little higher with the new mounts this will help with the ground clearance as the sump was only 1 inch from the floor because the front suspension had sagged and the rear top spring cushions had disintegrated as well.
I had a chance to visit an old guy that lives here in Waimate that has a collection of Triumphs rusting away in a paddock so that I could take measurements of all the components of the front suspension still in the car this will help me in fitting the new Herald parts. I now have enough measurements across the car from different points on the turrets that I will be able to run bars from turret to turret to get them square in relation to each other and then I will be able to figure out how to mount them.
Removing the engine and gearbox let me get a good look at the frame tubes and to my surprise every thing looks in good condition from just behind the front suspension all the way to the back of the car so other than adding a few extra tubes and some gussets for strength some sanding and paint will suffice . The tubes around the front suspension and the steering rack mounts have been chopped, repaired and changed over the cars life and will get reworked during the fitting of the new suspension and the radiator and nose cone will be remounted to suit.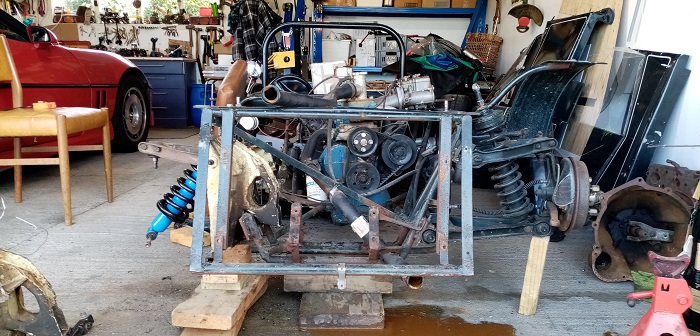
Good work Bruce, and your Project has a good mate in the garage - a C ..
Cheers
Roger
Hi Roger the strip down is going quite well, I'm good at pulling things to bits but putting them back together is a different story but it will all come together in the end. trying not to change too much but that front suspension was fighting its self and must have felt like riding a three legged horse in a corner. but the rest of the car seems to be pretty good so mostly just a freshen up and some small mods for safety's sake. I don't want it to look too pretty as a lot of old race cars are shinier than when they were built.
The Corvette is our weekend and trip car I rebuilt the suspension and did some small upgrades last year to keep myself occupied in the shed during Covid she will crank up to 150MPH and goes round corners like a champ but the missus says no racing in it she thinks its too fast, I'm too old and shes the one that has to wash my undies...
Today's job has been temporarily tying the front suspension turrets together as a unit to enable me to work out how to mount it into the frame, I used some measurements from a Herald that I had access to here in Waimate and I found a factory chassis drawing on line with the dimensions I needed to set them up in relation to one another. Some 10mm threaded rod inside alloy tube fitted through the chassis mounting bolt holes gave me the right width at the bottom and some alloy channel with some holes drilled through fitted to the top A arm bushing bolts set the top width. I should be able to work out the best way to mount them by fitting the whole unit into the frame and measuring them in relation to one another.
I have decided how much of the old frame tubes around the front suspension will need to be removed to fit the new parts so time to start cutting, the bits I am removing had been repaired, modified and poorly welded at some stage in the cars life and the suspension was misaligned and not true in its range of motion, So the new setup should be an improvement and this coupled with the increase in braking response with the disk brakes should help with control in the twisty bits.
The front track will be almost the same width and have the same ride height, but with sorter and heaver springs and better top spring/shock mounts and the ability to adjust the ride height with spacers.
The turrets when fitted to the Heralds and Spitfires are only bolted to the frame at the bottom but I will brace them from the top frame rail as well to increase the stiffness and I will need to figure out how to put some form of support at the bottom of the turrets to bolt the bottom A arms to. so on with the thinking cap.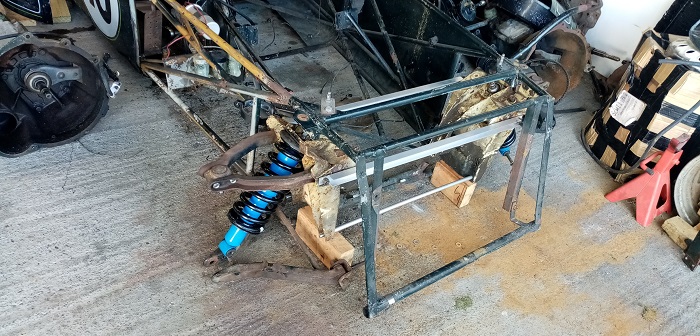
Time to start stripping the rest of the car down, Removal of the fuel tank and battery has allowed me to get a decent look at the rear suspension and diff, the setup is pretty standard for an early track car long parallel 4 bars with adjustable rod ends with mounts welded to the Standard 10 axle housings, coil springs and shocks and a panhard bar. all good stuff and with some new bushings and shocks and some paint it should be good to go.
I will also check the brakes and redo whats needed, the standard light 3/8 wheel studs have already been replaced with longer and thicker ones so that will save me a job as I have already ordered Land Rover Freelander M12x1.5 studs for the front hubs, this is a fairly common modification when fitting wider wheels on early Heralds and Spitfires as the stud shank size is the same and they press right into the hubs.
The small battery will be relocated to what would have been the passengers foot well if the car had 2 seats as I don't like the idea of having it so close to the fuel tank.
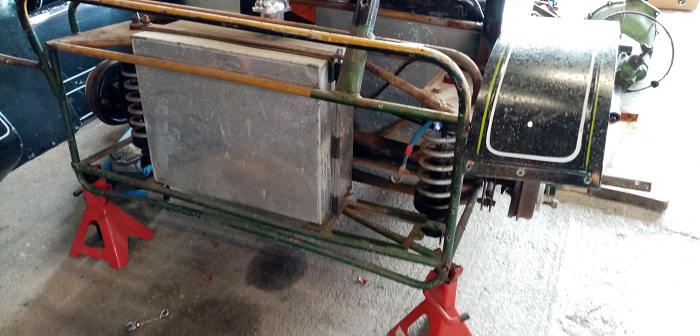
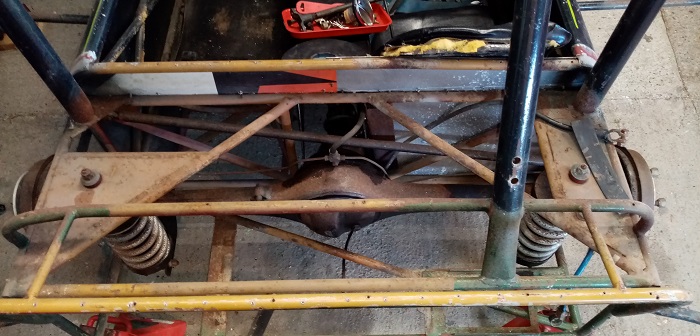
It looks like it has Herald front shocks and springs on the rear...
Could be I will have them out today so we will see. Cheers
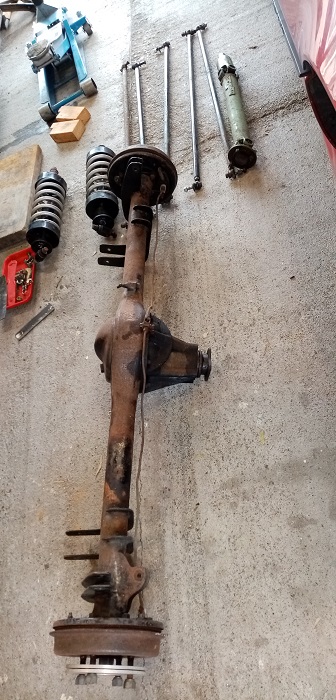
The first job for today is to remove the rear suspension components and the diff, the 4 bars are in good condition straight and true the rod ends are a little tight but I will grease them up and see if any will need to be replaced, the shocks are in poor condition so they will need to be replaced I should be able to adapt Triumph Herald front shocks and bushings to keep things simple. the springs will need a good sand and a coat of paint, the panhard bar is also in good condition so will be reused once painted.
The wiring has all been removed and will get redone and the gauges will be replaced with a matching set of Smiths style black face ones just a rev counter and Amp, Water temp, and Oil pressure gauges.
Removal of the seat was a simple task as it was only held in with one self tapping screw, its hard to believe you could once get away with that, A new seat will be fitted with some proper adjustable mounts so I will need to see what the new requirements are for this and if I will need to modify the frame to suit.
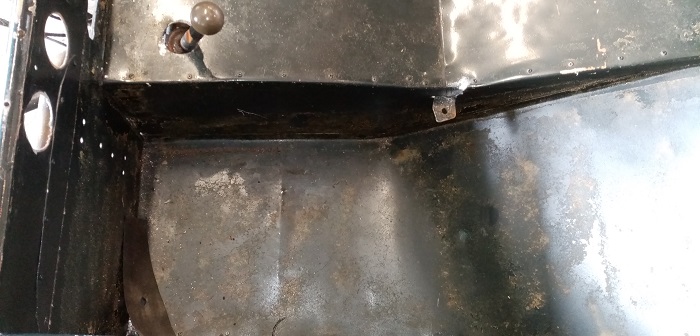
On with the fun, Removal of all the inner alloy panels is the next thing on the list, drilling out the rivets is harder than you would think as some drill out fine and some rivets just start spinning so with a mix of drilling, chiseling and sanding the heads off the panels are all out of the car.
This has revealed just how elaborate the frame is with a lot of triangulation of the tubes, some one has put a lot of thought into this. but I will add a few tubes and gussets where needed.
When compared to an early Lotus or Mallock chassis frame it appears to be quite different and although it looks like a lot of steel tube the use of 3/4 inch thin wall has made it reasonably strong and light.
Some may think I am going into too much detail on this thread but a lot of people don't get the chance to see the insides and dirty bits of these old Specials and if any part of this rebuild story is of any help to some one looking to rescue an old race car then that is enough for me.
I am not a mechanic or an engineer and I am equipped only with simple tools in a small cluttered home garage but luckily aided with the help of a few friends,
So I will make a few mistakes along the way and march to my own drum on a few occasions but there is an old saying '' If it don't get you dirty its not yours'' and in the end the journey can be as much fun as the destination.
Some of us, me for one, are enjoying reading about your efforts. The one thing I did notice was the angle of the panhard rod but i wonder if that is because the diff is at full droop.
Thanks for that Allan yes you are correct the angle changed due to the diff not being supported , the panhard angle when the car was sitting on its wheels still looked a little steep but due to its length and the fact that the suspension movement is minimal I don't think it is having an adverse effect on handling.
I did jump up and down on the rear of the car before I started stripping it down and the frame did not move unduly in relation to the wheels. [ high tec chassis tuning for dummies Ha Ha]
A good day in the shed today out with the drill and chisel extracting rivets,rivets and more rivets but at last the remaining body panels are off the car. the bottoms of the large panels had been folded under and wrapped around the bottom frame rails and have sustained a lot of damage over the years.
My plan has always been to keep as many of the outer panels as possible, I could easily reskin the whole car as the panels have simple curves but I like the patina that the car has and I do not want the car to look like it was built yesterday, Too many old race cars have been restored to better than new condition and that's fine if you want an art piece or investment. In saying that I should point out that I have the original 1950s build boot lid of the Lycoming Special hanging on the wall of my dining room but that car is an exception as the car is still racing and in the thick of it at most meetings.
So I will try to keep all the panels above the second rail from the bottom this will be a good compromise and will make things easier for me as all the inner floor panels had been poorly fitted on the inside of the frame and this exposed the bottom tubes to the elements and road debris so I will fit an alloy belly pan under the frame and have it meet the top panels at the second rail. This would have been common at the time the car was built on factory or series built race cars. Being able to see the frame rails inside the car will give it a period look as well.
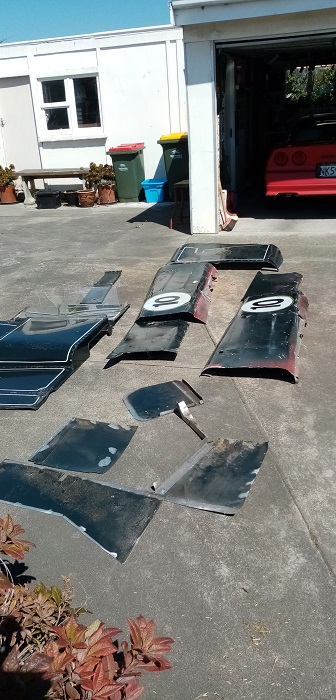
Great work B J B .. and again the " C " is in the background.
When taken apart the body panels look very simple.
Cheers
Roger
https://www.automotobookshop.com.au/...econd-edition/ loving this thread btw